TLDR
• Core Points: Curated gallery walls blend structure with personal touches using templates, spacing, and cohesive frames.
• Main Content: Strategy covers planning, layout templates, frame choices, art selection, hanging techniques, lighting, and maintenance for a polished result.
• Key Insights: Edit ruthlessly for cohesion, vary scale thoughtfully, and use non-obtrusive hardware for a seamless finish.
• Considerations: Room lighting, wall type, weight limits, ethical sourcing of prints, and accessibility for future updates.
• Recommended Actions: Sketch a layout, gather frames, curate art with a theme, measure precisely, and hang in stages for accuracy.
Content Overview
Gallery walls have long stood as a stylish, timeless way to infuse character and personality into a home. They can transform a plain hallway, a blank living room, or an underutilized stairwell into a dynamic focal point. The concept is deceptively simple: assemble a curated collection of framed art and photographs that, when arranged together, tells a story and enhances the space. Yet achieving a look that feels cohesive rather than chaotic requires careful planning and thoughtful execution. This guide provides a practical, step-by-step approach to building a gallery wall that looks curated—without the need to hire a designer.
The principles behind a successful gallery wall are rooted in balance, rhythm, and consistency. You don’t need to matching-matchy frames; instead, you can mix frames, media, and sizes while maintaining a unifying thread. This thread might be a shared color palette, a common subject matter, or a consistent spacing rhythm. By emphasizing a cohesive backbone and allowing for personal expression within it, you can achieve a gallery wall that feels intentional and refined.
Before diving into the layout and hanging process, it’s important to consider how the wall will function within the room. Think about the wall’s purpose: Is it a visual entry point, a storytelling gallery, or a family archive? Consider the room’s lighting, existing furniture, and color scheme. These factors will influence the choice of art, frame styles, and layout approach. With a clear goal, you can map out a plan that is both aesthetically pleasing and practically durable.
This guide outlines practical steps—from planning and layout to hanging methods and maintenance—that empower readers to create a gallery wall that looks curated, cohesive, and personal, all without relying on professional design services.
In-Depth Analysis
The process of building a curated gallery wall can be broken into four main stages: planning, layout design, framing and art selection, and installation plus maintenance. Each stage contributes to a refined result that feels intentional rather than accidental.
Planning and goals
Begin with a clear purpose for the wall. Are you aiming to showcase family memories, celebrate a theme (such as travel or nature), or create a visual narrative around a color or texture? Establishing a guiding idea helps narrow art choices and prevents the display from becoming a miscellany of unrelated pieces. Evaluate the room’s lighting: natural light can fade prints over time, while harsh overhead lighting can cast unflattering reflections on glass. If lighting is suboptimal, you may need to supplement with track lighting, wall sconces, or picture lights designed for gallery displays.
Assess the wall’s dimensions and orientation. A large, open wall invites a major statement with a grid or salon-style arrangement, while a narrow wall benefits from a linear, staggered configuration. Measure the available width and height, noting any architectural features such as doorways, light switches, or electrical outlets that will constrain placement.
Cohesive storytelling through color and materials
A gallery wall doesn’t require identical frames or subjects. Instead, seek a unifying thread. This could be a dominant color palette (for instance, black, white, and natural wood), a consistent matting choice, or recurring motifs such as botanical prints or black-and-white photography. To avoid visual noise, limit the number of frame finishes. A practical approach is to choose two or three frame styles or colors that complement the room’s overall aesthetic and use them deliberately across the arrangement.
Curating the art
Your collection can include a mix of prints, photographs, and mixed media—so long as they speak to the guiding idea. When sourcing art, consider both new acquisitions and personal favorites. Reproductions are perfectly acceptable if they align with the chosen theme and color scheme. For a more dynamic look, vary the art in scale: include a few large statement pieces alongside several smaller works. However, maintain a balance so no single item visually dominates the wall unless that is your intentional focal point.
Spacing and layout strategies
A successful gallery wall often hinges on spacing. A consistent matting border around each frame helps create breathing room and a cohesive feel. If you opt for frames of different sizes, establish a visual rhythm by aligning the edges along an invisible grid or by forming repeating patterns (for example, a central large frame flanked by two smaller frames, then two more medium frames outward).
There are two popular layout approaches:
– Grid or salon-style: A symmetrical, orderly arrangement that feels formal. This approach typically uses frames of similar dimensions and precise alignment.
– Eclectic, curated look: A more relaxed arrangement with varied frame sizes and orientations. This approach relies on a unifying color or theme and careful planning to avoid a sense of randomness.
Tools and templates can help. Use painter’s tape to simulate the footprint of frames on the wall, or cut out paper templates the size of each frame and tape them to the wall to visualize spacing and alignment before hammering any nails. A standard recommendation is 2 to 3 inches of spacing between frames in a grid or 2 to 4 inches in a more organic layout. For especially high walls or rooms with high ceilings, you may want to center the gallery at eye level (roughly 57 to 60 inches from the floor) and build outward.
Framing choices and presentation
The choice of frames influences the overall tone. Slim black metal frames offer a contemporary, graphic vibe; light wood frames tend to feel warm and inviting; white or off-white mats bring a crisp, gallery-like air. Mats can create a polished look by creating uniform negative space around art, especially when you are mixing different media. If you are framing non-traditional pieces (like textiles or small 3D objects), consider glass-front frames or shadow boxes to preserve and feature the material while keeping it safe from damage.
Art orientation—landscape vs. portrait—should be mixed intentionally. A combination of horizontal and vertical pieces can add visual interest, but avoid too many abrupt shifts in orientation that disrupt the flow. If you are displaying a collection of similarly themed pieces (for instance, a set of travel photographs), ensure their tonal quality and framing are consistent enough to tie them together even if the subjects vary.
Hanging methods and wall hardware
Proper hanging hardware is essential for safety and longevity. Use picture-hanging hooks or screws rated for the wall type (drywall, plaster, brick, or studs). For heavier frames, locate studs and use long screws or wall anchors for maximum support. When aligning multiple frames, a level is indispensable to ensure straightness. A laser level can speed up the process and improve accuracy.
Pro tips to streamline installation:
– Start with a central anchor piece at eye level, then build outward.
– Maintain symmetry in a grid layout by lining up top edges or side edges.
– Use temporary 1/4-inch spacers to maintain consistent gaps as you adjust the arrangement on the wall.
– Consider a “back-stops” approach: place a few frames, step back, adjust, and then add more pieces progressively.
Lighting and ambiance
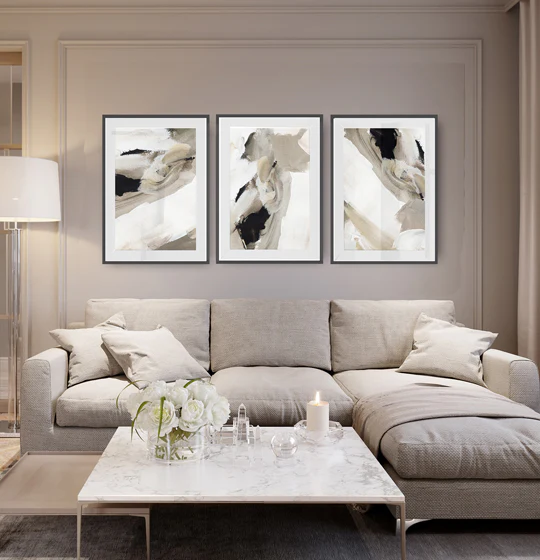
Lighting can dramatically affect how a gallery wall reads. If possible, position the wall to take advantage of natural daylight. For evening or darker rooms, supplement with targeted lighting, such as adjustable picture lights or track lighting aimed at clusters of frames. Avoid direct glare on glass by angling lighting slightly downward and choosing UV-protective glass or acrylic when possible to preserve art over time.

*圖片來源:Unsplash*
Maintenance and rotation
A gallery wall is not a static exhibit. It’s common to rotate prints as tastes change or to refresh for seasons or life events. Use a uniform storage system for back-ups and keep a simple catalog of what is displayed where. Regularly check for loose nails, bowed frames, or fading prints, and address these issues promptly to preserve the wall’s curated appearance.
Accessibility considerations
Design choices should account for practical use. If the wall is in a high-traffic area or reachable by children, ensure frames are securely mounted and avoid overly heavy pieces. Consider lighter-weight prints or using adhesive-friendly mounting options for rented spaces, where permitted, while still achieving a polished look. For renters, removable hooks or gallery strips can preserve walls without causing damage.
Budgeting and timeline
The cost of creating a gallery wall can vary widely based on the number of pieces, frame styles, and whether you rely on new purchases or repurposed frames. A practical budgeting approach is to allocate funds to a few anchor pieces and then fill in with affordable prints or secondhand finds. The timeline can range from a weekend project to a multi-week refinement, especially if you are sourcing art or waiting for shipping. Planning and pacing the process helps maintain cohesion and reduces impulse buys that disrupt the intended look.
Ethics and sourcing
When acquiring art, consider fair compensation for artists and creators. If you’re purchasing prints, check licensing terms and ensure you have the right to display the work publicly in your home. Supporting local artists, independent print shops, and galleries can add a meaningful dimension to your wall while reinforcing a community-centered approach to design.
Implementation timeline
– Day 1–2: Define purpose and select a guiding theme; inventory existing frames and art; measure the wall.
– Day 3–7: Source new pieces or plan rotations; test layouts with paper templates on the floor or wall.
– Day 8–14: Assemble frames, matting, and display materials; prepare hanging hardware and tools.
– Day 15+: Install the gallery wall, adjust alignment, and welcome final tweaks.
By following these steps—planning with intent, designing a cohesive layout, selecting frames and art with a unifying thread, and executing with careful hanging and lighting—you can achieve a gallery wall that feels curated and polished without professional help. The result should reflect your personality while maintaining a poised, timeless presentation that stands up to changing tastes and space requirements.
Perspectives and Impact
A well-executed gallery wall does more than fill wall space; it communicates an interior’s design philosophy. It can set the tone for a room, anchor furniture arrangements, and create a narrative that resonates with residents and visitors alike. When done thoughtfully, these walls can become a living display—one that evolves as you acquire new pieces, gather photographs from travels, or commemorate important moments.
One trend in contemporary interiors is the shift toward curated, flexible displays that blend personal artifacts with period or neutral elements. This approach allows for adaptability as homes change ownership, occupants move in, or aesthetic preferences evolve. A curated wall can accommodate digital prints alongside traditional photographs, abstract art, and meaningful mementos without losing its cohesive feel, provided the unifying thread remains strong.
The future of gallery walls lies in balancing personalization with design discipline. Digital art frames, rotating exhibitions, and modular framing solutions could offer even more flexibility for homeowners who want to refresh their walls seasonally or with minimal effort. As lighting technology improves and frame materials become more affordable and sustainable, the potential to create dynamic, layered walls will expand without requiring professional intervention.
At the intersection of practicality and artistry, the gallery wall remains a versatile tool for interior expression. It enables homeowners to curate their environment, honor memories, and celebrate aesthetics in a way that is both accessible and enduring. The most successful walls are those that tell a coherent story, maintain visual harmony, and invite ongoing conversation—about art, memory, and place.
Key Takeaways
Main Points:
– Start with a clear concept and plan before purchasing frames or art.
– Establish a unifying thread (color, theme, or matting) to achieve cohesion.
– Use templates to test layouts and ensure precise spacing and alignment.
– Mix media and sizes thoughtfully while maintaining balance and rhythm.
– Prioritize proper hanging hardware and lighting to ensure safety and presentation.
Areas of Concern:
– Inconsistent framing or spacing that creates visual chaos.
– Overloading the wall with too many pieces or underutilizing negative space.
– Poor lighting or glare that diminishes artwork and viewing experience.
Summary and Recommendations
Creating a gallery wall that looks curated without designer involvement is an achievable, rewarding project. The key is a structured process: define a guiding concept, plan with accurate measurements, select frames and art that reinforce a cohesive story, and execute with careful hanging and lighting. Begin by inventorying what you already own, gathering a few anchor pieces, and using paper templates to preview layouts before committing to nails or screws. Maintain flexibility by allowing for rotation and updates as your collection grows or your tastes shift. By balancing consistency with personal expression, you can craft a gallery wall that feels intentionally curated, timeless, and uniquely yours.
- Practical steps to start: define your wall’s purpose, measure precisely, create a mock layout with templates, choose a limited palette of frames, and test the arrangement on the floor before mounting.
- Long-term maintenance: periodically reassess the wall, rotate pieces, and ensure frames remain secure and protected.
In essence, a curated gallery wall is less about perfection and more about thoughtful composition. With careful planning, a measured approach to framing, and deliberate lighting, you can achieve a refined display that elevates the room and reflects your individual taste.
References
- Original: https://abeautifulspace.co.uk/how-to-build-a-gallery-wall-that-looks-curated-without-hiring-a-designer/
- Additional references:
- https://www.apartmenttherapy.com/how-to-create-a-gallery-wall-101404
- https://www.housebeautiful.com/decorating-ideas/galleries/a1966/how-to-hang-a-gallery-wall/
- https://www.designsponge.com/2010/02/curate-your-gallery-wall.html

*圖片來源:Unsplash*