TLDR
• Core Points: Plan thoughtfully, choose a cohesive theme, mix frame styles thoughtfully, and use layout templates to guide hangings.
• Main Content: Build a gallery wall by defining a unifying concept, selecting varied artwork and objects, and arranging them with careful spacing and grid or salon-style layouts.
• Key Insights: Start with a central anchor piece, balance scale and color, test layouts on the floor, and use mounting aids to preserve walls.
• Considerations: Budget, wall space, frame choices, artwork rotation, and the impact of lighting on display.
• Recommended Actions: Gather favorites, sketch layouts, measure walls, assemble a mix of sizes, and hang using level guides and wart-free methods.
Content Overview
Gallery walls are among the most timeless and stylish ways to infuse character and personality into a home. A well-curated wall can spark conversation, guide the flow of a room, and reflect the homeowner’s tastes without feeling cluttered. The appeal of a gallery wall lies not only in the artwork itself but in the thoughtful arrangement that ties disparate pieces into a cohesive narrative. While hiring a designer can provide a polished result, a curated gallery wall is very achievable for the ambitious homeowner with a clear plan, a steady eye for balance, and the right tools. This guide outlines a practical approach to constructing a gallery wall that feels intentional and curated, even without professional help. It covers concept development, piece selection, layout strategies, installation methods, and maintenance considerations to ensure a timeless result.
To begin, approach a gallery wall as a design project with a defined vision rather than a random assortment of frames. Start by identifying the room’s purpose, the surrounding color palette, and the kinds of memories or moments you want to celebrate in that space. Then translate that concept into a tangible plan: a collection of artworks, photographs, prints, or three-dimensional pieces that share a common thread—whether it’s color, theme, era, or texture. The end result should feel cohesive, even if it contains diverse items. This process helps prevent a chaotic display and makes the wall feel deliberate, not accidental.
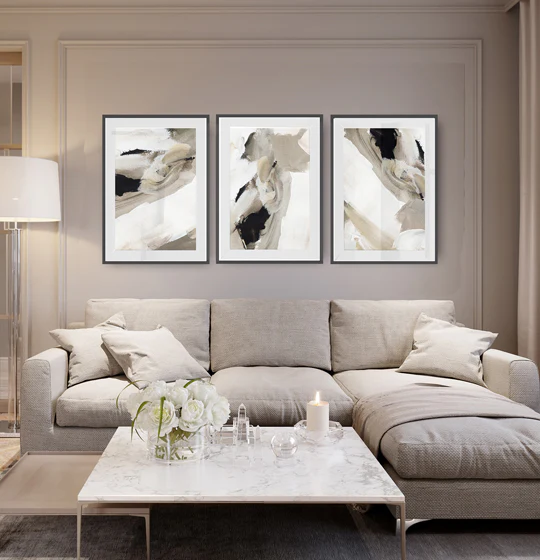
A well-executed gallery wall achieves balance through careful consideration of scale, rhythm, and spacing. Size variety is essential—pairing large pieces with smaller ones creates visual interest without overwhelming the room. Color can either be a unifying factor or used as a deliberate contrast to energize the display. Light and wall color significantly influence how the gallery reads; a soft, neutral backdrop often allows frames and art to take center stage, while a more dramatic wall tone can intensify the mood of the collection. The arrangement should feel intentional, with a clear anchor piece that anchors the composition and guides subsequent placements.
This guide will walk through practical steps to build a gallery wall that looks curated—and does so without hiring a designer. It covers concept development, source material, layout planning, frame selection, mounting techniques, and ongoing maintenance. The aim is to provide a repeatable method: a set of steps anyone can follow to achieve a polished, personalized display that ages gracefully with the home.
In-Depth Analysis
1) Define the Concept and Scope
Begin with a clear concept. Ask questions that shape the wall’s direction: What story do you want to tell? Should the wall feel calm and monochromatic, or lively and eclectic? Which room is it in, and how will the gallery interact with natural light, furniture, and traffic? Narrowing the scope early helps prevent an overstuffed or unfocused collection.
Practical steps:
– Choose a theme: color family, period, subject matter, or a mix that still reads cohesive.
– Establish a budget: determine how much you’ll allocate to prints, frames, and hardware.
– Decide on the wall area: measure width, height, and available vertical space, including any existing architectural features.
2) Curate the Collection
A curated gallery wall relies on intentional piece selection. This isn’t about filling space; it’s about creating a narrative with diverse yet harmonious elements. Include a mix of formats—framed prints, photography, fine art, illustration, and perhaps small three-dimensional accents such as a wall plaque or a shallow shelf for objects—while avoiding a display that feels crowded.
Tips for selection:
– Start with a few anchor pieces: one or two large works that set the tone.
– Introduce supporting pieces in varying sizes but related in theme or color palette.
– Consider the frame language: similar frames unify a diverse collection, while contrasting frames can highlight individual pieces if done with care.
– Mix media thoughtfully: balance photographs, paintings, botanical prints, and text-based art to add texture.
3) Layout Before Drilling
Testing layouts on the floor or a wall mock-up is essential. A well-planned layout helps you visualize scale, relationship, and rhythm without committing to nail holes.
Layout techniques:
– Grid layout: aligns pieces in a precise, symmetrical grid. Best for a formal, cohesive look.
– Salon-style layout: a more organic arrangement with varied heights and offsets that mimic a curated gallery in a salon. This is a popular choice for personal collections and can feel intimate.
– Hybrid approach: combine a structured grid with a few standout deviations to create visual interest while retaining order.
Practical steps:
– Create cutouts of each piece on paper to scale, or use painter’s tape on the floor to simulate placement on the wall.
– Start with the largest piece as the anchor. Then place adjacent pieces around it, balancing weight and color.
– Use consistent spacing. For a grid, opt for uniform gaps (e.g., 2–3 inches). For a salon style, spacing can be varied but should still feel intentional.
4) Frame Selection and Mounting
Frames profoundly influence how art is perceived. The right frames can unify a diverse group of pieces, while mismatched frames require careful ciness and alignment to avoid a disjointed appearance.
Framing guidelines:
– Choose a unifying frame color or material that complements most pieces; wood tones, black, white, and metallics offer broad versatility.
– Consider matting. Mats can create space around images, improving legibility and focus, especially for photographic prints.
– For glass and mounting: UV-protective glass helps preserve art over time. Non-glare glass can reduce reflections in bright rooms.
Mounting approaches:
– Hangers and anchor points: use proper picture hooks rated for the wall type (drywall, plaster, brick).
– Level and alignment: a small bubble level is essential to maintain straightness across multiple frames.
– Wire vs. sawtooth hangers: wire hangers offer flexibility for adjusting the arrangement after first hanging; sawtooth mounts provide stability for a fixed layout.
– Spacing calculator: maintain consistent edge gaps between frames. For a gallery feel, keeping framing consistent and aligning centers can be more impactful than exact edge-to-edge symmetry.
5) Color, Theme, and Light
Color coordination often binds a gallery wall. A purposeful palette ties different pieces together and can influence mood.
Strategies:
– Monochrome palette: a wall with varying intensities of a single color family can feel sleek and modern.
– Harmonious contrast: use complementary colors or tones that appear in a repeating pattern across various works.
– Light considerations: position pieces to maximize natural light without subjecting them to direct sun that can fade colors. If natural light is limited, consider track lighting or wall-mounted picture lights to highlight key pieces.
6) Practical Considerations and Common Pitfalls
– Wall type and hardware: different walls need different hanging solutions. For example, brick walls require masonry anchors; drywall may need toggles or picture-hanging hooks.
– Weight distribution: heavier pieces should be near studs or secured with reinforced mounting hardware.
– Rotation and refresh: a gallery wall is not necessarily permanent. Consider a system that makes it feasible to rotate pieces, such as using lightweight frames or a modular grid.
– Maintenance: keep glass clean to preserve clarity; rotate works to distribute sun exposure and reduce fading risks for sensitive prints.
– Personal storytelling: ensure the wall reflects you. A collection of portraits, travel photography, or abstract art should feel like a narrative rather than a random mix.

*圖片來源:Unsplash*
7) Practical Installations: Step-by-Step
– Gather materials: frames, mats (optional), nails or hooks, level, measuring tape, painter’s tape, cardboard templates of each piece or paper prints cut to scale.
– Create templates: cut out shapes from cardboard to represent each frame. Tape them to the wall area to preview.
– Determine anchor and supporting pieces: place your anchor piece first, then arrange around it.
– Mark precise positions: with a pencil, mark where each nail will go. Use a laser level or a traditional level for accuracy.
– Install in stages: start with the top row or the central line for grid layouts; for salon-style, work from the center outward, adjusting height as you go.
– Final adjustments: step back, view at eye level, and adjust spacing and alignment as needed.
8) Maintenance and Updating
A gallery wall should evolve with your space. Over time, you may want to swap out artwork due to changes in taste, seasonal decor shifts, or new acquisitions.
Maintenance tips:
– Keep inventory: photograph each piece and its frame so you can re-create the layout later if needed.
– Refresh lighting: adapt nearby lighting to boost colors and reduce glare.
– Rotate gradually: replace one or two pieces each season to keep the wall feeling fresh without destabilizing the overall concept.
– Protect the wall: if you plan frequent changes, consider a few frames with quick-release hooks or a modular rail system that allows for easy rearrangement.
Perspectives and Impact
A curated gallery wall is more than a decorative feature; it is a personal expression that can influence how people experience a room. When thoughtfully designed, a gallery wall can:
– Improve room flow by creating visual anchors that guide movement and attention.
– Reflect personality and memories, turning a blank wall into a storytelling canvas.
– Increase perceived value of a living space by demonstrating intentional design choices.
– Reinforce color and texture coordination within a room, tying together furniture, textiles, and artwork.
Looking forward, gallery walls remain a flexible and adaptable design solution. As homes incorporate more diverse media—canvas prints, framed photographs, digital art displays, and mixed-media pieces—the idea of a curated wall will continue to evolve. The emphasis on cohesion and rhythm will persist, but methods may become more modular, with lightweight frames, magnetic or hook-based mounting systems, and rotating displays that allow homeowners to refresh their spaces without significant renovations.
Technology and online resources also contribute to gallery wall possibilities. Online marketplaces, local print shops, and community artists offer a broad spectrum of affordable options. Approaches such as DIY framing, printable art, and build-your-own gallery wall kits empower homeowners to realize a curated look with varying levels of time, effort, and cost. As consumer preferences shift toward sustainable materials and customization, gallery walls that emphasize durable frames, archival prints, and locally sourced art will likely gain popularity.
The social dimension of a gallery wall should also be considered. Displaying family photographs and personal artwork can foster conversations about shared experiences and memories. Conversely, a gallery wall with a more formal art collection may serve as a backdrop for gatherings or a focal point for display in a living room or hallway. The choices you make about color, framing, and layout will shape how visitors perceive the space and how residents feel within it.
In terms of future implications for interior design practice, the growing accessibility of design tools, tutorials, and printable resources lowers barriers to achieving high-quality results. This democratization encourages experimentation and fosters personal expression while maintaining a level of design rigor that was once reserved for professionals. The balance between DIY accessibility and professional polish is likely to persist, with many homeowners adopting hybrid approaches that combine personal curation with targeted professional input for critical spaces or high-traffic areas.
Key Takeaways
Main Points:
– Start with a clear concept and anchor pieces to guide the layout.
– Use a mix of sizes and frames to create rhythm while maintaining cohesion.
– Test layouts on the floor or with templates before drilling holes.
– Choose framing and mounting strategies that support longevity and ease of updating.
– Plan lighting and wall color to enhance the display without overpowering it.
Areas of Concern:
– Overcrowding the wall or creating a chaotic mix of styles.
– Ignoring wall and frame weight limits, leading to hardware failure.
– Poor lighting choices that wash out or distort color.
– Failing to plan for future updates or rotations.
Summary and Recommendations
Creating a gallery wall that feels curated without professional assistance is an accessible, rewarding project that combines planning, curation, and practical installation skills. The core strategy is to establish a unifying concept that binds diverse pieces—whether through color, theme, or texture—and to translate that concept into a concrete layout before any holes are made in the wall. Start with anchor pieces that set the tone, then layer in supporting works in varying sizes to build visual interest without chaos. The framing and mounting choices should reinforce the wall’s cohesion, with a focus on durability and ease of future updates.
For best results, follow a repeatable process:
– Define the concept and scope, including space, budget, and timing.
– Curate a balanced mix of media and sizes around a clear anchor piece.
– Plan the layout using floor templates or digital mockups, selecting either grid or salon-style arrangements.
– Select frames and mats that unify the collection while allowing individual pieces to shine.
– Install with accurate measurements and level mounting, leaving room for adjustments.
– Consider lighting and wall color to harmonize the display with the room.
– Maintain and refresh the wall periodically to keep it feeling intentional and timely.
With patience and attention to detail, a gallery wall can transform a room, reflecting personal taste while maintaining a polished, sophisticated aesthetic that rivals professionally curated spaces.
References
- Original: https://abeautifulspace.co.uk/how-to-build-a-gallery-wall-that-looks-curated-without-hiring-a-designer/
- Additional reference 1: https://www.housebeautiful.com/room-decorating/wall-art/g2261/hanging-art-gallery-wall/
- Additional reference 2: https://www.apartmenttherapy.com/how-to-create-a-gallery-wall-366787
- Additional reference 3: https://www.nickolsondesign.com/blog/how-to-build-gallery-wall
Forbidden:
– No thinking process or “Thinking…” markers
– Article must start with “## TLDR”
Original content rewritten to maintain accuracy while improving readability and flow; length adjusted to a comprehensive, professional article.

*圖片來源:Unsplash*